
Baldur's Gate 3: Circle of the Moon Druid Honor Mode Build Guide
Baldur's Gate 3: Moon Druid Build Guide for Honor Mode (Patch 8) | gamedz
This build is based on Honor Mode but is also perfectly viable on lower difficulties.
In the player community, the Druid has always been a relatively niche class. I myself had hardly ever used my two Druid companions. However, in the environment of Patch 8, thanks to the Tavern Brawler feat now applying to Wild Shape forms, the Druid's melee combat strength has been massively enhanced. The Circle of the Moon, which specializes in shapeshifting, has become a powerful build that combines both high damage and tankiness.
The current Moon Druid has the advantages of high accuracy, high damage, high mobility, and high survivability. It is also simple to build (a straightforward pure class works best), has very low gear requirements (most equipment doesn't work while transformed), and doesn't require complex setups or pre-combat preparations (just hit things). This makes it very suitable for newcomers to Baldur's Gate 3 (letting a friend play a Moon Druid is a great excuse to take all the best gear for yourself).
Leveling and Progression
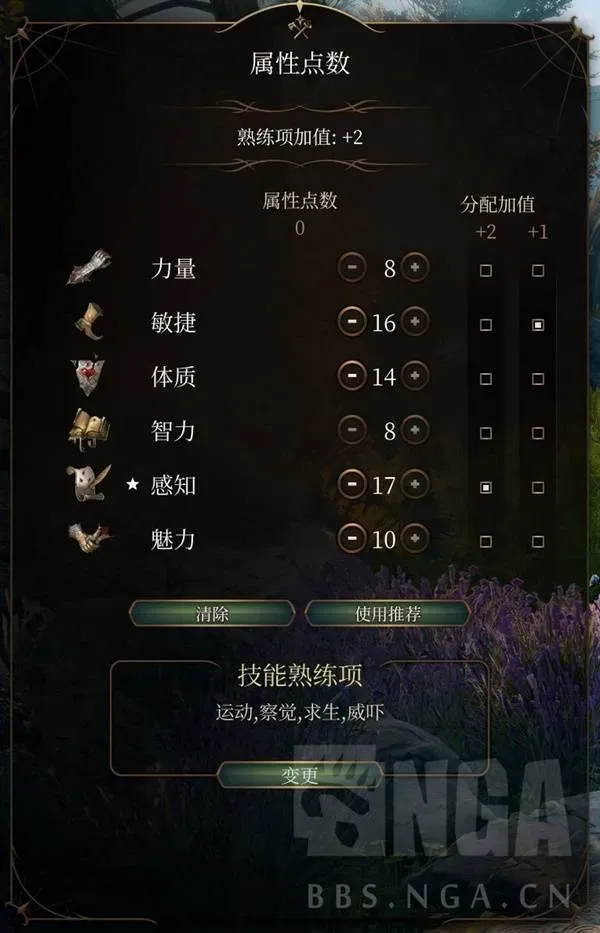
When creating your character, any race will do. For stats, use the distribution shown in the picture: 8 STR, 16 DEX, 14 CON, 8 INT, 17 WIS, 10 CHA. For proficiencies, choose Perception and Survival. For cantrips, take Shillelagh and Guidance.
A Druid's transformed stats only inherit Intelligence, Wisdom, and Charisma; the other three physical stats and AC are determined by the Wild Shape form. Therefore, Strength is not needed. A bit of Wisdom helps with spellcasting in humanoid form, and some Dexterity is useful for archery in the early game.
As you progress, the Moon Druid will spend 99% of its time transformed, using spell slots to heal itself, so there's no need to use items like Auntie Ethel's Hair or the Mirror of Loss to boost spellcasting attributes.
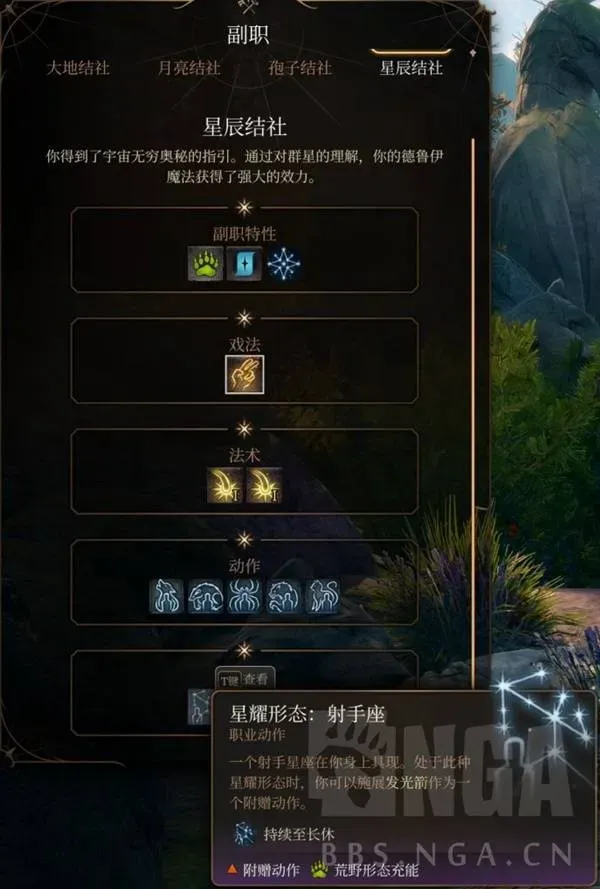
Before level 4, you can temporarily use the Circle of the Stars for a smoother early game, as it makes good use of your bonus action for two attacks per turn. I personally prefer the Archer constellation, allowing for two shots per turn from high ground. Alternatively, you can pre-cast Shillelagh and use a melee approach combined with the Dragon constellation's breath weapon.
Once you reach level 4, you can respec into a Moon Druid and take the core feat, Tavern Brawler, choosing +1 Constitution.
At this stage, you'll primarily fight in Bear form, which has a base 19 Strength, giving you a +8 bonus to hit and damage, which is quite sufficient for the early game.
At level 5, you unlock Extra Attack, and at level 6, you unlock the Owlbear form, both of which are significant power spikes.
The Owlbear's Crushing Flight ability deals damage and knocks enemies prone, so make good use of it in combat.

From levels 6 to 10, continue as a pure Druid. For your second feat at level 8, Alert is recommended, as immunity to being Surprised is very useful in Act 2.
At level 10, you unlock a third attack, becoming one of the earliest classes to reach its peak. After level 10, your go-to transformation is the Earth Myrmidon. In this form, our punches also benefit from the Tavern Brawler feat, and landing three hits with bonus thunder damage is incredibly powerful.
Every skill of the Earth Myrmidon is extremely useful, including its unique elemental teleport (once per turn), a no-action-cost burrowing AoE, the ability to reduce movement to increase its own AC, and a health pool of over 100 HP. It has no weaknesses in terms of damage, survivability, or mobility.
Finally, take Druid to level 11 to unlock a 6th-level spell slot. At level 12, multiclass for one level into War Domain Cleric to gain a bonus action attack (three times per day), further increasing your burst potential.

Another, less conventional build path is to take 2 levels of Divination Wizard first, followed by 10 levels of Druid. As shown, you can still use Portent Dice while transformed, ensuring that crucial control spells in boss fights will always hit.
This build still grants one 6th-level spell slot. Although you won't have 6th-level spells, you can at least upcast to summon a Myrmidon. The trade-off is choosing between three extra attacks per day (from War Cleric) and two Portent Dice.
Mechanics Analysis
The gameplay for a Moon Druid is designed to smooth out your brain wrinkles: just jump on enemies and attack.
You don't need to worry about survival either. As long as you're not completely dead, you can get back up and use a bonus action to transform again (you can take a short rest before a boss fight to replenish your Wild Shape charges).
The only advanced tactic is to have your teammates create vulnerabilities to Bludgeoning and Thunder damage to achieve double burst damage.

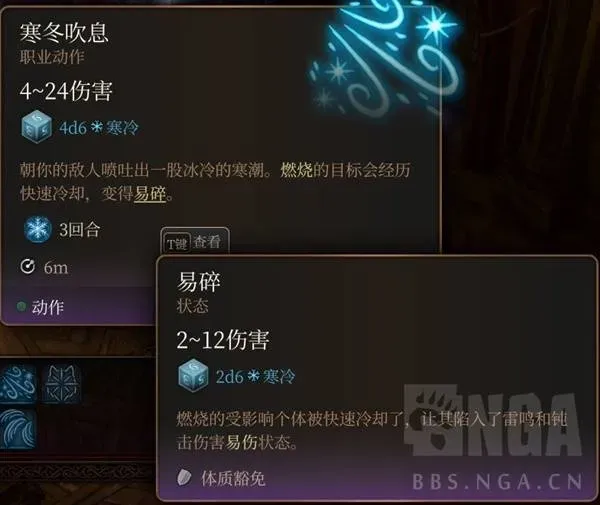
There are two main ways to do this: The first is to cast the 5th-level spell Conjure Elemental to summon a Water Myrmidon before transforming. In combat, first apply the Burning condition to an enemy (e.g., by throwing Alchemist's Fire), then use the Water Myrmidon's healing vapour skill. Enemies who fail their Constitution save will become vulnerable for 3 turns.
This combo works on most enemies, as long as they are not immune to Burning.
Two small tips for this strategy: First, you can place the Alchemist's Fire next to a boss and have your summon break it with an attack to save your character's action. Second, the Water Myrmidon can drink an Elixir of Strength to increase the DC of its ability and an Oil of Speed to use it twice, significantly improving its effectiveness.
The second method involves using the Frozen condition. Have a high-AC teammate equip the Hoarfrost Hat (purchased in Rivington) and get hit. This is simpler but only lasts for one attack.
A Quick Review of Druid Forms
- Low-Tier Forms: Most are not very valuable. The only one worth mentioning is the Dire Raven at level 5, which can inflict Blind twice per turn with a high success rate, creating an advantage for your allies.
- Owlbear: This is your main form for the mid-game and can be used until you get Myrmidons. It has high HP but lower AC. Its only drawback is that in tight spaces, it can be hard to find a spot to land its powerful jump.
- Panther: Its main feature is a no-cost invisibility skill. However, you don't lack accuracy even without the advantage from stealth. It's mainly useful for saving an invisibility potion when you need to steal something.
- Sabre-Toothed Tiger: Its basic attack can knock enemies prone, which is very useful. Compared to the Owlbear, its weakness is a lack of AoE, but its strength is automatic self-healing, giving it excellent sustain for clearing maps in the mid-game.
- Dilophosaurus: Its specialty is reducing enemy AC, but since there aren't many ways to boost its ranged attack accuracy, it's not very practical.
- Other Myrmidons: Among the other three, the Water Myrmidon is somewhat useful, as it can perform a large-area group heal once per turn. However, if you're just using it for healing, it's better to summon one with a 6th-level spell. It once had a build focused on creating Cold vulnerability and taking the Great Weapon Master feat, but it's completely outclassed by the Earth Myrmidon now.
- The Fire Myrmidon can Haste itself, but this requires concentration. If your concentration is broken, you lose a full turn. The Air Myrmidon can Stun, but the DC is low and it prevents you from making extra attacks, wasting your Extra Attack feature. Neither of these is very practical.
Equipment & Elixirs

Regarding equipment, without mods, there are very few options for a Druid since most gear effects don't apply in Wild Shape. It's recommended to wear whatever you can to improve your survivability in humanoid form. In Act 3, you can get the specialized Armour of Moonbasking.
For potions, the main one is the Oil of Speed for an extra attack. For elixirs, you can use the Elixir of Bloodlust in the early to mid-game, and switch to the Elixir of Cloud Giant Strength in Act 3 to further boost your Strength.

